Thursday, October 29, 2009

For The Love Of Lumps: Finished Result!

After much experimentation, trauma, unplanned designed changes (ie: accidents) and screeches of utter torment - behold, the Two Lumps Necklace!


Everything went together incredibly smoothly once all the components were in place. Aside of having to measure the chain links and aesthetically balance everything for the best effect, nothing out of the way took place, and no more forsaken laments of operatic proportions were necessary. I did sand down and appropriate several aluminium washers for use, since I wanted to break the monotony of the chain somewhat. I think it worked.


Eben came together looking as smart and savvy as he is in the comic. As well he should, after all that trouble!


Snooch, dear darling round Snooch, looking as comfy and lovably nuts as always.


And one can't forget Birdbirdbird after all, looking all smart and unruffled.

It's been quite the experience and all for a good cause. How much better can that get?

The Two Lumps Necklace will be on auction at Tarlia's blog sometime during the next few days. If you're Malaysian, passionate about animals, and want to do a good deed for some very deserving dogs and cats, come support the cause! There are some other lovely handmade items that will be going up on auction as well, so come check it out and drop a bid or two!

For The Love Of Lumps: Process, Part 2

When we last left off the Great Insane Two Lumps Necklace Project, the glued-together shapes were being flattened under a pile of delicious recipe books and awaiting verdict.


Part 4: DOOM DOOM DOOM DISASTER DOOM

Well. They turned out -awful-. I thought it might improve things if I matte-sprayed them, but nooooo, the ultimate consensus was that very little - save perhaps Cthulhu eating them or an elephant stomping on them - would help matters.


They just weren't up to standard. Well, my standards anyway and those are extravagantly high. Then again, I'm the one with a reputation at stake if I put something as shitty as this up for auction, so it was time to go back to the drawing board...


Part 5: Remedying Doom and Disaster, Take One

...or rather, the sawing table, in this case. I re-cut the shapes. Given that I did not, at that point in time, -have- a proper clamp and sawing block, my left arm protested very loudly against the force it needed to hold down the CD pieces and keep them from breaking. My table also has a few new saw-tooth notches on it to add to the ones already collected.

For those of you who do not actually believe that my room looks like a drug lab, I hereby submit proof that sawing CDs make a perfectly good substitute for LSD on a film set:


And that's just the edge of my table where I was sawing, folks. The floor under that is a hundred times worse.

Oh. Did I mention that this heroic undertaking was being conducted somewhere around 2am in the morning? Yes, I am a leeeeetle bit insane, why do you ask?

The result:


Note the liberal distribution of white powder all over the edges. Most of it goes away with careful wiping off, but sometimes the sharp end of a jewellery file is needed to get it all clear. The design was drawn into the CD with permanent black Sharpie. It comes off with some concerted cleaning effort, so I wasn't worried that the outlines would be eyesores (so much for permanent, but I'm thankful in this one case).

After filing and sanding down the shapes, I decided that I wouldn't repeat the 'sandwich', and would just stick to having one layer of Lump with the printed quotations on top. I was very pleased with the way Snooch turned out - even though the clear H20-based clear acrylic top coat that I was using was absolute -evil- to work with. I plead first-time usage and user error, rather than the product itself, however.


Eben, however, was a totally different matter from his rounder, much easier-going brother. The varnish insisted on being as temperamental as a PMS-ing woman deprived of chocolate, and I wound up using at least 4-5 coats before I was satisfied. And even then, I didn't like the way the paper wrinkled up and left dark lines.

Ultimately I didn't have to worry about that either because an accident with the latest layer of top coat wound up pulling the -entire- 4-5 coats loose - so there went 2 hours' work or so down the drain.

I re-varnished Eben again, and it -still- didn't come out half as professional as I wanted it to. The dark lines at the wrinkles got even worse, which wasn't particularly a very big crime, but again - me, perfectionist, much. Besides, drilling the holes had made a very slight hairline crack at the edge of one of the holes...


...so against my sanity, I redid the bloody thing. Yes, again. I'm aware this may be considered obsessive-compulsive, but I try to keep my work looking as professionally top-notch as any handmade labour of love can be.

This time, despite the ungodly hour of 3.30am, Eben came together beautifully, for which I was both amazed and incredibly thankful. Because if not, I wouldn't have been able to cut another shape - my saw frame wingnut decided to die an untimely death, and I've yet to have time to go down to the hardware store to replace it.


Part 6: Muffin Love n' Lemon!

One of my absolute favourite crazy quotes from the Two Lumps strips involves a bottle of green food colouring and the words 'Muffin love 'n' lemon'. When I mentioned my intention of including this on the necklace, Tarlia went EEEEE so of course, that made it mandatory.

I sawed the heart shape out of the CD remnants from the previous cutting spree, and salvaged another bit from the previous experimentations on Modern Sunset. Sanding them down and getting them coloured and calligraphed was the -easy- part. The varnish, on the other hand, put on a magnificent temper tantrum and kept me at it for the better part of 3 hours -and- 5-6 coats - which ultimately got ruined by a sheet of paper, so I had to redo that all. Over. Again.

Contrary to popular belief, my favourite activity does -not- actually involve frantically trying to pry paper loose from a delicate layer of varnish, and having the entire several coats rip off along WITH the ink on the words. There may have been a loud soul-searing screech of torment and dismay, but I shall neither confirm nor deny this. Suffice to say, at nearly 4am, sweet dreams are -not- made out of these.

However, as with all things, this too passed, the damage was repaired, and the tags finally turned out quite nicely, all in all.


Part 7: And All The People Rejoooooooooiced

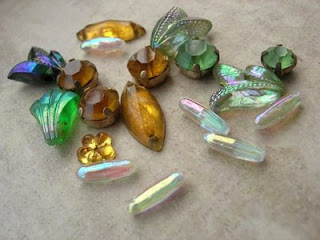
Once all the pieces had either dried or otherwise been repaired, it was time to put everything together and see what sort of mayhem would emerge. I'd kept one particular glass bead for a long time - clear base, black spots, yellow centre rather like a bumble bee (see above picture for reference). For whatever reason, it just seemed to fit perfectly in with the Lumps and the overall comic feel, and besides, I needed something to weight the necklace down so it would hang right - the CD shapes were too light to provide much in the way of heaviness.

After some fiddling around with some 20ga artistic wire, I managed to come up with a decent connector that would allow the bead to both spin, and serve as a stylish little piece to hang the tags from.

I arranged all the components out on my bed, like so:


...and then I put everything together with the help of two pairs of pliers, an obsessive-compulsive perfectionism, and a sense of humour (there was a certain amount of fear and trembling involved, but after wrestling with that varnish and re-cutting the shapes four times, everything subsequent seemed rather stress-free in comparison.)

Tomorrow: The Finished Project! Stay tuned!

Friday, October 23, 2009

For The Love Of Lumps: Process, Part 1

Last month, a friend asked if I wouldn't mind making a piece of comic-or-literary-themed jewellery for a deserving and worthy auction which she was kicking off for her birthday celebration. I was delighted, and thus was born what I've nicknamed 'Project Lumps'.

The first hurdle was deciding what theme to pick for the piece. Both Tarlia and I devour books with the voracity of bottomless guppies, but now we needed to find a book both of us had read before, and that proved slightly more difficult. When she suggested a comic strip instead, I promptly told her 'Two Lumps!' and her resultant 'Uh oh...I'm almost afraid to see what sort of jewellery comes out that...' sealed the project's fate.

Besides, it was fitting. Both of us love cats, and Two Lumps is about a pair of incorrigible, extremely funny felines. It's worth a look, certainly, if you're into wicked, sometimes scatalogical, dark and sometimes slapstick humour.

I decided to make a necklace. I also wanted it to be at least partially made out of recycled materials, and I had clear CDs in abundance. I'd managed to get hold of some Eco-felt made out of recycled plastic bottles as well, so that was all good.

Now all I had to do was get started.

Step 1: The Lump Shapes


First thing I did was sketch two rough shapes of the cats and transfer them to one of the CDs. Then I taped both CDs down and started sawing for dear life. My room still looks like a drug lab gone wrong, with all the white powder flying everywhere. I've also got several notches in my wooden desk where the saw slipped, which is probably why they ask you to set up a proper workshop for these sorts of things, but I've only got a room so that's going to have to do for now. Besides, it'll ensure no one will ever want to steal that desk later down the road, if by some freak chance some idiot thief meandered in and decided to make off with everything in the house.


Next came the second most tedious part of the process - filing and sanding down the shapes (the most tedious part is the sawing. Or maybe that's because I'm not very good with handling one of those yet.)

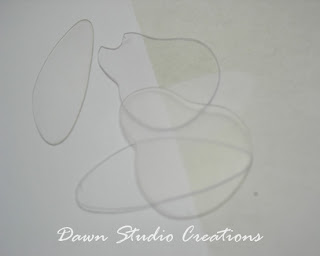
When I got done with that, I sprayed two of the shapes with semi-gloss polyurethane, resulting in this (the two blurred shapes are the sprayed ones):


Step 2: Birdbirdbirdbirdbird

One of the iconic strips in Two Lumps is this one, featuring a bird. I wanted to have the bird in the necklace too, so I cut up a few felt shapes, and sewed the sucker together.


So, now I had the Lumps, the Bird, the strip I wanted to use printed out, and the design wall done.


I've been trying to keep a design journal with inspirations and collages in it, having been inspired by several artists like Deryn Mentock and Teesha Moore. I collaged several quintessential Two Lumps strips together and made some design notations so I at least know what I'm doing and won't hare off into territory that I can't find my way out of later on (it's been known to happen. Wires are forgiving, acrylic, hell no.)


Step 3: Putting the Lumps Together

I wanted to make an acrylic 'sandwich' of a Lump quotation in between two shapes, so I got out the Mod Podge and started the scary process of gluing everything together. Normally this isn't so much of a problem, but Mod Podge is evil stuff to work with and get smooth (or I don't know how to use it properly still). Either way, I ran into trouble at the get go, and had to resort to clever camouflage to make it look a whole less obvious that I'd been happily gluing things to my heart's content.


I'm still not entirely sure it worked. At any rate, it was time for the next part of things...


...No, these aren't just pretty books, they're what I'm sandwiching the shapes in, so everything will (hopefully) glue together right. The French Laundry Cookbook is a loan from a friend who also happens to be a wonderful cook -and- cellist, how cool is that? Falling Cloudberries is mine, and it's a lovely, lovely book with gorgeous pictures and even more gorgeous recipes. I've made some of them and I can vouch for the deliciousness.

Tomorrow, after everything dries, I'll get around to drilling holes, figuring out how to make the Muffin Love n' Lemon tags that I want on the necklace, and generally attempting to put things together without going to pieces in more ways than one.

Stay tuned!

Saturday, October 17, 2009

Worth vs. Value and a Can of Alien Worms

'You made those earrings yourself? Do you know so-and-so? She does jewellery too, I had her fix some stuff for me, and she made this piece for me, see!'

After the above brief exchange with a well-meaning friend, it took me a moment to get over the sharp twinge of annoyance, and then I went home wondering why I was so annoyed. After some serious thinking and taking the entire conversation apart, I've realised something quite simple:

I do not want to live my life by everyone else’s comparisons.

As a person who’s almost fanatical about keeping a distinct amount of privacy between myself and the outside world, this can sometimes be difficult. More so as a developing artist struggling to even be comfortable calling myself ‘artist’, and painfully aware of every shortcoming and screw up in my work.

As an emerging jewellery-maker and crafter, this issue of ‘comparisons’ is the biggest bugbear of my existence.

After all, it’s about finding a voice and the right path – the little byway explored that produces a sudden ‘click’ in the head, like gears interlocking at last and you know somehow, against all instincts sometimes, that you’ve got to follow like Alice down the rabbit hole, or forever wonder.

I suppose everyone starts off trying to find their particular niche – comfort zone – call it whatever you like, but that particular state of being where there’s a solid centre that feels right – by learning from other people’s work. If imitation is the sincerest form of flattery, it’s also a very good teacher. You learn technique and you learn elements of design (if you’re wise and lucky, you might have gotten a good grounding in all this already in art school or something similar). You learn that no, you don’t open jump rings with your fingers. You find out that you can’t stand weaving 4-in-1 chainmaille because it doesn’t click even after 72 hours of working on one measly length of bracelet, but Byzantine is a breeze.

You also figure out that what works for everyone else might not work for you. Or rather, it’s a gradual process – wrap, twist, weave, knot and curse till your fingers turn raw, and then one day, all frustrations come to a head when you realise you’ll never come up with anything original that has to do with wires, knots, or weaving, and you might as well just give up while you’re behind.

So you turn to hammering things flat. And realise, guiltily, it’s so much more instant gratification. It feels comfortable. Ahhh, but is that really –art- or is it just a cop-out? the brain whispers maliciously, it’s obviously not as intricate as –real- wirework, the knots and wraps and so on. Come on admit it, you’re a second-rate charlatan, you just can’t stick the hard work.

Who wants to admit to being second-rate? You redouble your efforts and keep on trying to weave, trying to work the damned wire into proper shapes that go flawlessly when –other- people attempt it, but when you do, they mysteriously graduate into tangled chunks of unhappy matter that even birds wouldn’t nest in. It’s either you’re a) slow b) stupid or c) just don’t have the knack, and of the three alternatives, c) is the scariest of the lot. Because, you see, it’s so easy for –everyone else-, something –must- be wrong with you since you can’t do it.

‘Why isn’t your work symmetrical?’ A friend laments, albeit half in jest one day. It takes me ten minutes to fully formulate a reply, and weeks after to brood on it to come up with what finally feels right as an answer. My personal answer anyway.

Symmetry is –boring-. At least, for me, it is. Now, there’s definitely a time and place for it, like the Venetian necklace I struggled with for two weeks, and creating two similar pieces for a pair of earrings can occasionally be the most harrowing thing on earth. It requires a great deal of skill, but to me, it’s still boring. I can do symmetry in my sleep.

Asymmetry however, that requires some serious thinking to balance out two halves of a whole, or three, for that matter. It challenges me. It makes me go, ‘…uh, no, that idea won’t work, the thing looks schizophrenic.’ Or, ‘Hey! That fits…why I don’t know but it fits and nothing else will do.’ It forces me to step out of my comfort zone and go out on a limb.

(My old studio art teacher would be thrilled. He told me once that I was ‘too safe’, that I kept myself to such a tight symmetry that I was restricting myself. It took me a while to get over the bad grades and the angry hurt at my work being judged like that, but he was right – even though I still think there might have been a better way to break it to a tense, pugnacious 18 year old who was trying so, so hard it was almost brittle.)

Along the way, I’ve discovered also I like clean lines and simple designs – a friend calls it an ‘industrial edge’. It only looks simple, I've found. You can’t cover anything up with an overlay of wirework. It either is, or it isn’t, and sanding down a circle for an hour over is not my favourite past time (or anyone’s that I know, really). But it’s got to be done, or it won’t be obsessively, plainly, uncompromisingly –round-. It just won’t look as good. There’s a lot of love put into that one, stupid, easy little circle in Modern Sunset. To everyone else however, it’s just a circle.

This is where the whole issue of ‘worth’ vs ‘value’ comes marching in. Intriciate has always been prized above the plain and simple. There’s nothing wrong with this. By and large, it’s merited since intricacy involves an amount of labour and skill that should be compensated accordingly. However, I find myself struggling with the mentality that intricate = mad skillz and simple = so easy it’s not worth paying for.

Case in point: I sawed several shapes out of old CDs to prepare for a big project. Not intricate, no. Labour-intensive? Hell yes. Skill? Absolutely, it took several tries and one ruined CD to make the curves easier to negotiate so I didn’t snap the sawblade. Simple? Well. The shape was. The process –leading- up to the simple shape looking as simple as it finally did involved an excrutiating amount of labour, skill and finesse. Try filing down a shape with needle files and sandpaper for an hour to get it perfect, drill a hole only to have the thing crack, re-cut and re-sand the whole damned thing again, then come tell me it’s ‘easy’.

So. What all this boils down to is this: I make jewellery, yes. It doesn't mean that just because I stick with stark and simple, I'm far less capable or that my work is worth far less than anyone else's gorgeous piece of wire-wrapping or silver-smithing. It doesn't mean that my work has to look like everyone else's, and it definitely doesn't mean that my artistic vision is similar to anyone else.

Well. Technically, in an ideal world, yes.

But in the meantime I'm still trying to work out where I fall in the grand spectrum of things. Because, given the society in which I live in, the company that sometimes comes around me and the perceptions of several millenia, I'm still never going to be considered Good Enough to be in the company of artists who do Actual Skilled Work.

I keep -telling- myself that I'm an artist. Now I just need a mental rework and several layers of thick skin to remember that I can't - and shouldn't - live by anyone else's comparisons.

Much less my own.

Recycled Experiments

I've been quiet lately, partly due to real life being rather busy and partly due to some stuff I've been wrestling with. Mostly the question of value - in this society, anything fancy and intricate is almost immediately viewed as more valuable than stark, simple lines and plain design. As my designs tend towards clean lines and simple aesthetics, I'm still sorting things out; that's another post in itself though.

In the meantime, I have, thanks to my wonderful father, obtained two saws - one with really fine blades for cutting plastic, and another ordinary one for metal. I've been experimenting with the fine blades on the clear CDs one finds as placeholders, since I'm trying to make at least a portion of my work from recycled materials of a sort.

The results are as follows:


Recycled Pendant: Black Sharpie, red permanent ink, recycled CD hand-cut into shape, recycled paper.


Modern Sunset: Recycled CD hand-cut into shapes, permanent ink, rhodium-plated chain.


For the recycled pendant, the pattern marks were made at the back of the shape by scraping needle files in various wave-like patterns. The inks take better that way, I've found, since the surface is rougher. The black Sharpie was smeared over the patterns before it dried out completely. I backed the entire thing with some paper leftover from a project, which had some blue ink printing on it, just so it would have more colour and allow the patterns to be more visible.

Modern Sunset was basically just cut and sanded into shape, using coarse sandpaper to make random marks on the underside. Then I hand-tinted the lot with permanent ink. It's a fairly simple design but quite labour intensive, due to sawing, sanding, drying times for inks and matte spray, and also for the Mod Podge I used to glue everything together.

All this is basically in preparation for a Bigger Project that I've been working on for a good friend. I think they turned out all right, as practice pieces go.

As to what artistic merit they have in comparison with more intricate wireweaving and wirework...I don't know. I'm still working it out, though I suspect that many people where I live now would go, 'Not worth charging for.'

Friday, September 11, 2009

Talisman: Warding Earrings

Some time ago, in an attempt to get out of my creative slump, I played around with my stash of annealed steel wire and some lovely blue-grey top-drilled pearls. This resulted in two lovely little pearl-wrapped links that I had no idea what to do with. I put them away, hoping that I hadn't wasted my time and that they'd come in handy some day.

Recently, a dear friend of mine - the Other Half of what's been fondly dubbed the Disaster Duo (me being the Next Half) - requested a pair of earrings with the words Be and Gone. There's a very amusing story behind that which isn't appropriate to tell here, but suffice to say we promptly christened them the Talisman Earrings of Warding.

Lo and behold! After trying to figure out materials to use to complement the black lacquered shell discs and the grunged-up type, I pulled out the pearl-wrapped links and they were absolutely perfect!

Sherri dear, I proudly present the Earrings of Warding and I hope you like them as much as I loved making them! They measure slightly over 2.5" from earhook to dangle.


Talisman: Warding Earrings: 24ga and 19ga annealed steel wire, top-drilled pearls, lacquered shell discs, paper, acrylic paints, mixed metal findings.


Trying to photograph these little beauties was a challenge. I have no idea why...


Who'dathunk steel wire and pearls would actually go together so well. It's something to keep in mind for future projects!

Wednesday, September 09, 2009

Sanctuary, Sanctuary

Sounded like an angel singing somewhere
Sounded like an angel singing
'Sanctuary, sanctuary...let me be your
Sanctuary, sanctuary...
When you cannot find the light
Of your own shining star
I will help you to remember
Who you truly are...'

--'Sanctuary', Joshua Kadison


Listening to Joshua Kadison's 'Venice Beach Sessions' in a somewhat contemplative mood after a few weeks of creative block resulted in this piece, inspired by his beautiful song 'Sanctuary'. That and I'd wanted to try the very interesting wrapped pod pendant I'd seen on Deryn Mentock's challenge piece - I don't have the book but I thought it might be worth a try, and it was!


Sanctuary: 18ga and 22ga copper wire, 20ga silver-plated wire, felt, glass and acrylic seed beads, vintage faux bronze pearls, vintage gold beads, foil glass twist beads, brass bead caps, gauze ribbon, bugle beads, Swarovski black pearls, mixed metal findings, Czech fire polish crystals, faux green pearl, vintage crystal chaton montee.


I wrapped the pod out of felt after a few trial and errors, filled it with some beautiful green Czech fire polish crystals, a faux pearl and a spacer. It came together very nicely after some skirmish with the wire, and I added a sprinkling of red seed beads for colour. It reminded me of being wrapped up and safe. I added a crystal dangle to see if it would look better, and I think it did.


I chose a rather earthy palette for the beads - somehow, Sanctuary brought up images of peaceful oceans and sky, so I used colours that I thought might reflect that. I sprinkled it through with a few vintage golden seed beads too, like sunlight.


For some contrast to the strung beads and to soften the necklace profile somewhat, I added a length of ruched gauze ribbon gathered with a series of seed beads. Couldn't resist putting in a tiny little vintage chaton montee dangle at the edge of the connector, just for colour!

I might add a little tag with 'Sanctuary' on it, but I'll wait for my font printouts tonight before I do that. All in all, I'm pleased with this! I do need to find a model to wear it so I can photograph it on a stand...hmmm, I need to start looking around for a mannequin at this rate unless I can find some other creative ideas to photograph necklaces.

Addendum:
...And I wound up photographing myself wearing Sanctuary, just to give an idea of how it falls. Not the greatest shot in the world, but it will do for now. The entire necklace measures approximately 16.5" from top to dangle.

Monday, August 10, 2009

The Talisman: Hope Earrings Properly

"Meh," she said tiredly. Shoulders slumped, arms curled around her drawn-up knees, she was the perfect dictionary definition of 'dejected' and 'discouraged'.

He touched her shoulder lightly as he settled down to sit beside her. "It'll pass. Trust me. Might take a little time, but you'll get through this. You're tough. And I'm here for you, whenever you need me."

She gave him a sidelong glance. "Promise?"

He took her hand and squeezed it reassuringly. "Promise."


Talisman: Hope Earrings: 20ga and 28ga artistic wire, stainless steel balled headpins, antique blue glass seed beads, Miyuki teardrop beads, lacquered paper on shell. RM40


The Talisman: Hope earrings grew out of a period of extreme creative dryness; it was a Marc Cohn song called 'Thunderbird' that set the mental images running and resulted in my first attempt at making word/text charms.


The colour scheme was an important part of the project: silver artistic wire for the proverbial silver lining of every cloud, blue for the lovely blue of the sky that reminds one to look up and beyond one's problems every now and again. The clear teardrop beads reminded me exactly of bubbles - fragile, iridescent, just like the beginnings of hope.

Wednesday, August 05, 2009

Talismans and Hope

Because today has been a strange and unusually discouraging day, it probably accounts for why this little piece insisted it be named Hope. I finished it too late to take any good pictures, and since I'm going outstation to help my boss teach tomorrow, this will have to do for now until Friday:


I've been toying all afternoon with the idea of Talisman Earrings like this - little word-or-text charms incorporated that encourage or at least give food for thought. I think...well, what do you think? (I'm an English graduate, among other things. The written word is as voluptuous as chocolate to me, so my opinions are necessarily biased.)

Whee! Maybe this is a sign that my creativity is finding its way back.

Thursday, July 30, 2009

Aliens on the Brain

I never knew that the creative spark could be so infernally fickle. The last few weeks of my life have been spent battling an innate sense of 'I must be doing something wrong because I can't think of anything creative, and I can't make anything worth my time' and some horrendous weather that's got my sinuses all in a pother.

For some reason or other, however, I've had aliens on the brain for the past week, and it seemed as good a starting point as any to start experimenting to see if the creative block would finally go away.

And inspiration I found indeed, in the form of Janice Berkebile's beautiful pod rings and kanto lanterns! Her classes can be found here, and pictures of her amazing work.

Thus was born the Alien Pod Bloom Thingy. It's my first time attempting to weave wire, and it came out atrocious in places, which required some creative rescuing. I'm sure there's an easier way to form the blasted pod that doesn't require a centre bead to shape which keeps falling out and rolling into remote corners behind the computer. It's a start though! Here's hoping the ideas slowly start coming back or I'm sunk.


Alien Pod Bloom Thingy: 18ga, 20ga and 26ga artistic wire, faux pearls, Czech glass seed beads.


Note to self: Do not attempt to string too many pearls onto one side of a deformed pod, and seed beads really are the way to go for non-bumpy decoration.

I'm also working on what I've facetiously nicknamed the Caterpillar Ring, but that's going to take some modification, given I have no idea what I'm doing, sort of.

Monday, July 06, 2009

Chainmaille Fire

I loathe being ill. It's the biggest cause of brain atrophy that I know, and one whole week of being unwell has sapped my energy beyond belief. However, I'm getting back there and trying to track down an errant Muse - which is probably on vacation in a lovelier climate than the one I'm ensconced in at present, but that's beside the point.

My shipment of chainmaille rings from Blue Buddha Boutique FINALLY came through, thank GOD - it did about a month ago but the hassle of trying to get it out of the post office customs department should be a plot for some slapstick theatrical production. -Why- in the world wouldn't an official letter put an official address on it, thereby cutting down on the necessity of running to and fro between TWO customs departments (the one in the post office and the Customs Department proper)?

Anyway, this is one of the projects I completed while on vacation - Rebeca, your rings are marvellous! I love the colours!


Polyhedron earrings: Fire


Japanese Cross earrings: Fire

Saturday, June 20, 2009

Old Love Haunts Me In The Morning...

She's alive! She's survived those 260+ teenagers!

Well, 'survived' is one thing, 'sanity' is another, but the kids managed to sing the (much shortened) entirety of Handel's Coronation Anthems from memory in 3 days. Was soooooooo proud of them at the night concert when they performed - the alto section that I was coaching stepped up to the plate and did marvellously too, was even prouder of them!

After that, a vacation was absolutely necessary, and I've just come back from a wonderful week's visit with my family and my brother who's just flown back to NYC. A MUCH needed rest, I might add - for the last few days I've been slowly recharging my creative batteries and even creating a couple of new things which will eventually get posted when I photograph them (in one case, it's 'recreate', as the originals were gifts that I didn't get a chance to take proper pictures of before they went to their thrilled new owners.)

However, I have finally managed to finish my 'Buried Treasures' necklace - the one that was going to incorporate all those beautiful antique beads and chaton montees! She's called 'Old Love Haunts Me In The Morning', after a song by Marissa Nadler, and here she is:


Old Love Haunts Me In The Morning: Vintage lucite and glass seed beads, vintage chaton montees, vintage faux pearls, Czech glass seed beads, brown glass foil twist beads, Siam Swarovski crystals, brass findings, purple shell pendant, 14ga sterling silver handmade clasp.


Tried to get a closeup of some of those beautiful beads - the chatons are even more beautiful in person than when photographed. The sparkle has to be seen to be believed, and to think they're at least 40-50 years old! And the vintage gold beads are just as lovely; they've developed their own patina over the years apparently.


This is one of the vintage floral lucite beads. I've never seen a finish like that on any of the more recent lucite beads I've looked at. It's absolutely amazing, just like the colours of a rainbow through a soap bubble.


There's a story to those coppery rings - they were originally clasps, but the connector rings broke! Rather than waste them, I sanded them down and put them to good use in the necklace. I think they fit the look and feel pretty well.

Marissa Nadler's beautiful ballad, 'Old Love Haunts Me In The Morning', kept going round and round in my head till I figured it had to be translated into a necklace somehow. I've always imagined that old love fondly remembered is like a golden memory, and in the morning sunshine, it's even more vivid - hence the various tones of gold and burnished copper-bronze speckled through with scarlet to represent 'love'. I tried to incorporate a sense of 'haunting' into the gradual colour gradation from golden to deeper browns and purples, since old love, while beautiful, can sometimes bring with it a darker tone of regret and sadness. The Swarovski crystals and bright chaton montees are the 'sparkle' that accompanies the other half of such memories - the good times, and those that we would never exchange for anything else.

The occasional flash of pale green in the vintage lucite floral bead and chaton montee is reminiscent of the evergreen nature of fond memories.

Old love haunts me in the morning
La da da da da da da da di
Old love haunts in the evening
When the remnants of pictures come alive

I told you that I loved you
I laid the summer down
Come all your careless wanderers
By the lake with the days of ruin

When I first saw you in the sunshine
With the speckles and flaxen in your eyes
When I first saw you in the moonlight
It is true that I thought that I might die

I told you that I loved you
By the lake with the summer gone
Come all your careless wanderers
By the lake with the days of ruin

Thursday, May 28, 2009

Buried Treasures

In a day's time, there are going to be some 300-400 children and youth milling around me and I'm going to wonder where my sanity is. In short, I'm festival staff in the upcoming Malaysian Choral Eistedfodd and 7th Young Singers Choral Festival which starts on Saturday. The competition involves the secondary school choir I've been tutoring for the last few months - that's one worry there already! - but in the Festival, I'm going to be sectional leader for the altos and that's even more of a worry. Why? Because this year we're attempting to sing a few selections out of Handel's Coronation Anthems.

If unexplained, screechy thundery sounds drift through in the next few days, it's probably me trying to get the young 'uns to sing properly. Apologies in advance, especially if it leads to thunderstorms.

However, today I finally found time to go through a stash of vintage beads I inherited a few years back - and I discovered buried treasure. Literally!


Vintage crystal chaton montees - in their original packaging! And more than one, I might add. There are several different colours, some are in plastic bags and those I suspect are probably glass since they don't have the sparkle of the crystal ones, but they have patina'd so beautifully, all it took was a polish of the stones and they still look good.


Some of the other treasure finds: vintage lucite beads, more chatons and some other beads which could be glass or crystal. I don't know. They just look gorgeous though!

I got all of these from a family member - a very elegant lady who used to have her clothes tailored in Hong Kong back in her heyday. I know the beads were bought in Hong Kong; I've got some of her dresses and every single one of them is embroidered with a selection of all these different chatons and beads. They're top-quality, that I know - she wasn't one who would settle for second-rate stuff. And that's not counting the bags and bags of seed beads, faux pearls, and other silver-lined bugle beads and things that are in those 15lbs of inheritance!

I can't -wait- to do something with these lovely shinies. Deryn Mentock's beautiful jewellery has given me some ideas, but they may have to percolate over the course of the competition and the festival. Ahh well - it'll distract me so I don't murder anyone in the course of the week from sheer frustration...